How to install a general pressure gauge in a water treatment system?
Leave a message
Hey there, folks! As a supplier of general pressure gauges, I've seen my fair share of water treatment systems, and I know how important it is to have a properly installed pressure gauge. In this blog post, I'm gonna walk you through the steps of installing a general pressure gauge in a water treatment system, so you can keep an eye on the pressure and ensure everything's running smoothly.
Step 1: Choose the Right Pressure Gauge
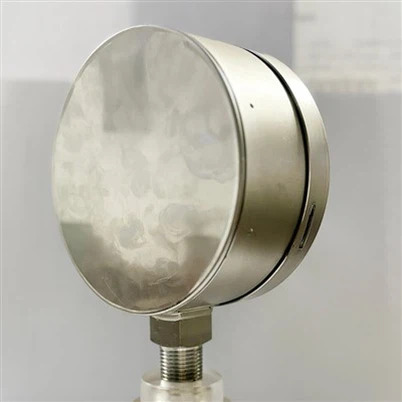
First things first, you need to pick the right pressure gauge for your water treatment system. We've got a variety of options here, like the Panel Mount Black Steel Case Pressure Gauge. It's great for mounting on panels and gives you a clear view of the pressure. Then there's the Bottom Connection Black Steel Case Pressure Gauge, which is designed for systems where you need a bottom connection. And if you're looking for something more durable and corrosion-resistant, the Bottom Connection Stainless Steel Case Pressure Gauge is a top - notch choice.
When choosing, think about the pressure range your system operates in. You don't want a gauge that can't handle the high pressures or one that's way overkill for your needs. Also, consider the environment where the gauge will be installed. If it's in a wet or corrosive area, a stainless - steel case might be the smart pick.
Step 2: Gather Your Tools
Once you've got the right pressure gauge, it's time to gather your tools. You'll need a few basic things:
- A wrench: This is for tightening the connections. Make sure you have the right size for the fittings on your pressure gauge and the water treatment system.
- Teflon tape: It helps create a tight seal between the threads of the gauge and the system. You don't want any leaks!
- A drill (if needed): In case you're mounting the gauge on a panel or something, you might need to drill holes.
- Safety glasses: Safety first! You don't want any debris getting in your eyes during the installation.
Step 3: Prepare the Installation Area
Before you start installing the pressure gauge, you need to prepare the area. Shut off the water supply to the system. This is super important to avoid any spills or water spurts while you're working. Then, clean the connection point on the water treatment system. Remove any dirt, rust, or debris that could prevent a good seal.
If you're mounting the gauge on a panel, mark the spots where you'll drill the holes. Make sure the gauge will fit properly and that it's in a place where you can easily read it.
Step 4: Apply Teflon Tape
Take the Teflon tape and wrap it around the threads of the pressure gauge connection. Wrap it in the direction of the threads so it doesn't come loose when you're tightening. You want about 3 - 5 wraps. This will help create a leak - proof seal when you connect the gauge to the system.
Step 5: Connect the Pressure Gauge
Now it's time to connect the pressure gauge to the water treatment system. Carefully screw the gauge onto the connection point. Use your wrench to tighten it, but be careful not to overtighten. Overtightening can damage the threads or the gauge itself. A good rule of thumb is to tighten it until it's snug and then give it a little extra quarter - turn.
If you're mounting the gauge on a panel, insert it through the holes you drilled and secure it with the appropriate mounting hardware.
Step 6: Check for Leaks
Once the gauge is connected, turn the water supply back on slowly. Keep an eye on the connection point to see if there are any leaks. If you see water dripping, turn off the water supply again and check the connection. You might need to tighten it a little more or re - apply the Teflon tape.
Step 7: Calibrate the Pressure Gauge
After you've confirmed there are no leaks, it's a good idea to calibrate the pressure gauge. This ensures that the readings are accurate. Some gauges come pre - calibrated, but it's still a good practice to double - check. You can use a known pressure source to compare the gauge reading. If the readings are off, you may need to adjust the gauge according to the manufacturer's instructions.
Step 8: Monitor and Maintain
Once the pressure gauge is installed and calibrated, you're all set! But don't just forget about it. Regularly monitor the pressure readings to make sure your water treatment system is operating within the normal range. If you notice any sudden changes in pressure, it could be a sign of a problem in the system.


Also, perform regular maintenance on the pressure gauge. Check the connections for tightness and look for any signs of damage or corrosion. If you see any issues, replace the gauge as soon as possible.
Why Choose Our Pressure Gauges?
We take pride in offering high - quality general pressure gauges. Our gauges are made with precision and are built to last. Whether you need a panel - mount gauge or one with a bottom connection, we've got you covered. And with a variety of materials like black steel and stainless steel, you can choose the one that best suits your system's needs.
If you're interested in purchasing a general pressure gauge for your water treatment system, or if you have any questions about installation or our products, don't hesitate to reach out. We're here to help you make the right choice and ensure a successful installation.
References
- "Water Treatment System Basics" - A handbook on water treatment system components and operations.
- "Pressure Gauge Installation Guide" - Manufacturer's guide for installing pressure gauges in various systems.