How to check if an oxygen pressure gauge is working properly?
Leave a message
Hey there! As an oxygen pressure gauge supplier, I've seen my fair share of these nifty devices. One of the most common questions I get from customers is how to tell if an oxygen pressure gauge is working properly. Well, you're in luck because I'm gonna break it down for you in this blog post.
First off, let's understand why it's so important to have a properly functioning oxygen pressure gauge. Oxygen is used in a wide range of applications, from medical settings like hospitals and clinics to industrial processes. In medical use, inaccurate readings can mean the difference between a patient getting the right amount of oxygen or not, which can have serious consequences. In industrial settings, incorrect pressure readings can lead to equipment malfunctions and safety hazards. So, making sure your gauge is working right is a big deal.
Visual Inspection
The first step in checking an oxygen pressure gauge is a simple visual inspection. Take a good look at the gauge. Is the glass face cracked or scratched? A damaged glass can not only make it hard to read the gauge but can also let in dust and moisture, which can mess with the internal components. If you see any cracks or significant scratches, it's probably time to replace the gauge.
Also, check the needle. It should be straight and properly attached to the movement. A bent or loose needle can give inaccurate readings. Make sure the needle is resting at zero when there's no pressure applied. If it's off to the side, even a little bit, that could be a sign of a problem.
Checking the Connections
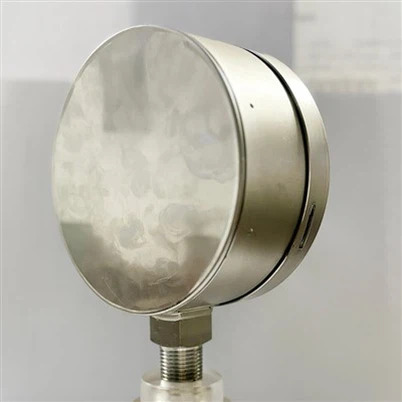
Next up, we've got the connections. Oxygen pressure gauges can come with different types of connections, like the Bottom Connection Oxygen Pressure Gaue and the Back Connection Oxygen Pressure Gauge. You need to ensure that the connections are tight and leak-free.
A loose connection can cause pressure leaks, which will give you false readings. Use a wrench to check the tightness of the connections, but be careful not to over-tighten them as that can damage the gauge or the fitting. You can also use a soapy water solution to check for leaks. Apply the soapy water around the connections and look for bubbles. If you see bubbles forming, that means there's a leak, and you'll need to fix it.
Testing the Pressure Range
Now, let's test the pressure range of the gauge. This is a crucial step to make sure the gauge is giving accurate readings within the specified range. You'll need a calibrated reference gauge for this test. A calibrated reference gauge is a gauge that has been tested and certified to give accurate readings.

Connect both the gauge you're testing and the reference gauge to the same pressure source. Slowly increase the pressure and compare the readings on both gauges. The readings should be within the specified accuracy of the gauge you're testing. If there's a significant difference between the two readings, then your gauge might be faulty.
Response Time
Another thing to check is the response time of the gauge. When you increase or decrease the pressure, the needle on the gauge should move smoothly and quickly to the new pressure reading. If the needle moves slowly or jerks, it could be a sign of a problem with the internal mechanism of the gauge.
![NCD3XZ[P3[P[Z6XN[CT]3FF(001)](/uploads/202442773/back-connection-oxygen-pressure-gauge471c2b1c-8b61-431d-b907-d4216d2d8952.jpg)
To test the response time, quickly increase the pressure and observe how the needle moves. It should reach the new pressure reading within a reasonable amount of time. Do the same when decreasing the pressure. If the gauge doesn't respond properly, it might need to be repaired or replaced.
Hysteresis Test
Hysteresis is the difference in the gauge reading when the pressure is increasing compared to when it's decreasing. A good oxygen pressure gauge should have minimal hysteresis. To perform a hysteresis test, slowly increase the pressure to a certain level and note the reading. Then, slowly decrease the pressure back to the starting point and note the reading again.
The difference between the two readings should be within the acceptable limits specified by the manufacturer. If the hysteresis is too high, it means the gauge is not accurate and might need to be replaced.
Zeroing the Gauge
After all these tests, it's a good idea to zero the gauge again. Make sure there's no pressure applied to the gauge and check if the needle is at zero. If it's not, you can usually adjust it using a small screw or knob on the back or side of the gauge. Follow the manufacturer's instructions for zeroing the gauge.
Regular Maintenance
Regular maintenance is key to keeping your oxygen pressure gauge working properly. Keep the gauge clean and free from dust and debris. You can use a soft, dry cloth to wipe the gauge down regularly. Also, make sure to store the gauge in a clean and dry environment when it's not in use.
If you notice any problems with the gauge during your regular checks, don't hesitate to get it repaired or replaced. Ignoring small issues can lead to bigger problems down the road.
When to Replace the Gauge
Even with proper maintenance, oxygen pressure gauges have a limited lifespan. If you've had the gauge for a long time, or if it fails any of the tests we've discussed, it's probably time to replace it. Using a faulty gauge can be dangerous, so it's better to be safe than sorry.

Contact Us for Your Oxygen Pressure Gauge Needs
If you're in the market for a new oxygen pressure gauge or if you have any questions about the ones you already have, we're here to help. We offer a wide range of high-quality oxygen pressure gauges, including the Bottom Connection Oxygen Pressure Gaue and the Back Connection Oxygen Pressure Gauge. Our team of experts can assist you in choosing the right gauge for your specific needs. Contact us today to start the conversation about your oxygen pressure gauge requirements.
References
- Manufacturer's manuals for oxygen pressure gauges
- Industry standards for pressure gauge testing and calibration